Wipe down the area in which you wish to attach the rest with alcohol and let dry before attempting installation.
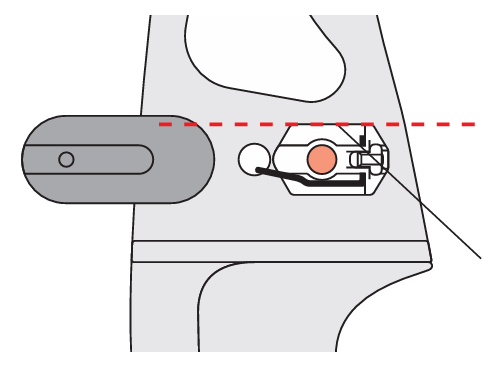
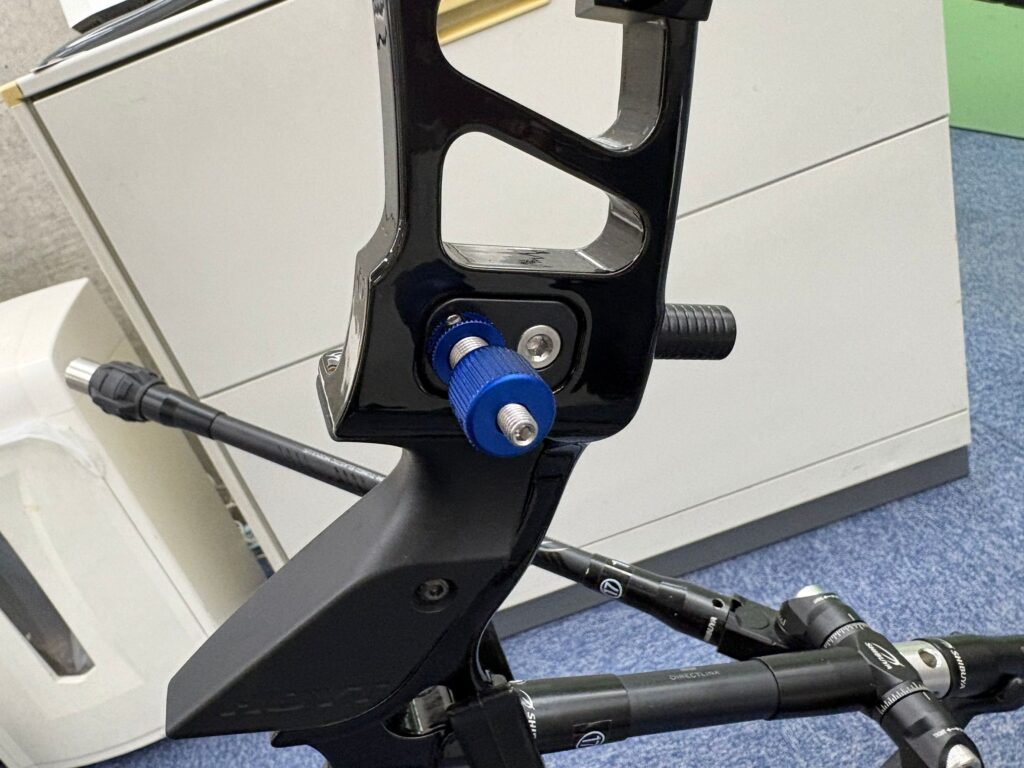
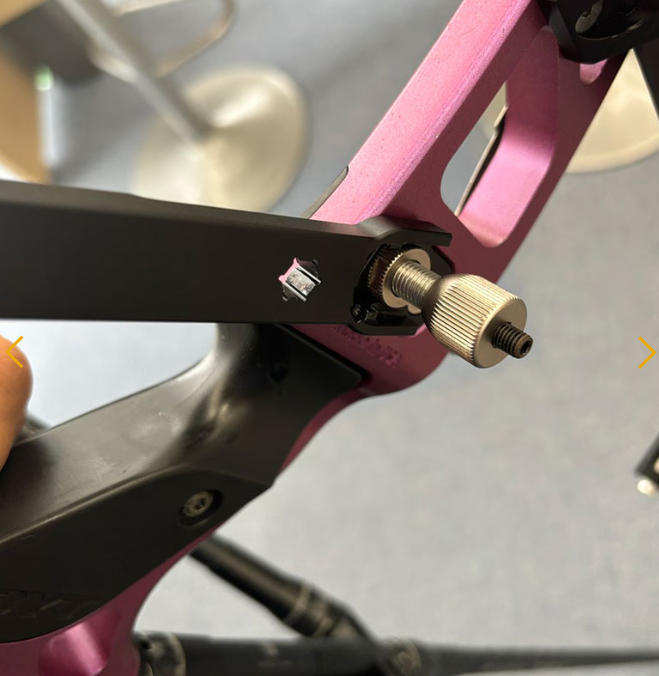
Attach rest so that the plunger extends through the hole in the rest, and align at a right angle to string.
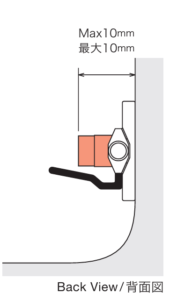
Plunger can only be extended to a certain extent. A Shibuya Plunger can be extended up to approx. 10mm from the inside plane of the bow riser’ s sight window. Extended any further, the Plunger will push against the rest from the inside and cause it to come loose. Please use a long plunger tip in case this distance is not sufficient.
Plunger can only be extended to a certain extent. A Shibuya Plunger can be extended up to approx. 10mm from the inside plane of the bow riser’ s sight window. Extended any further, the Plunger will push against the rest from the inside and cause it to come loose. Please use a long plunger tip in case this distance is not sufficient.
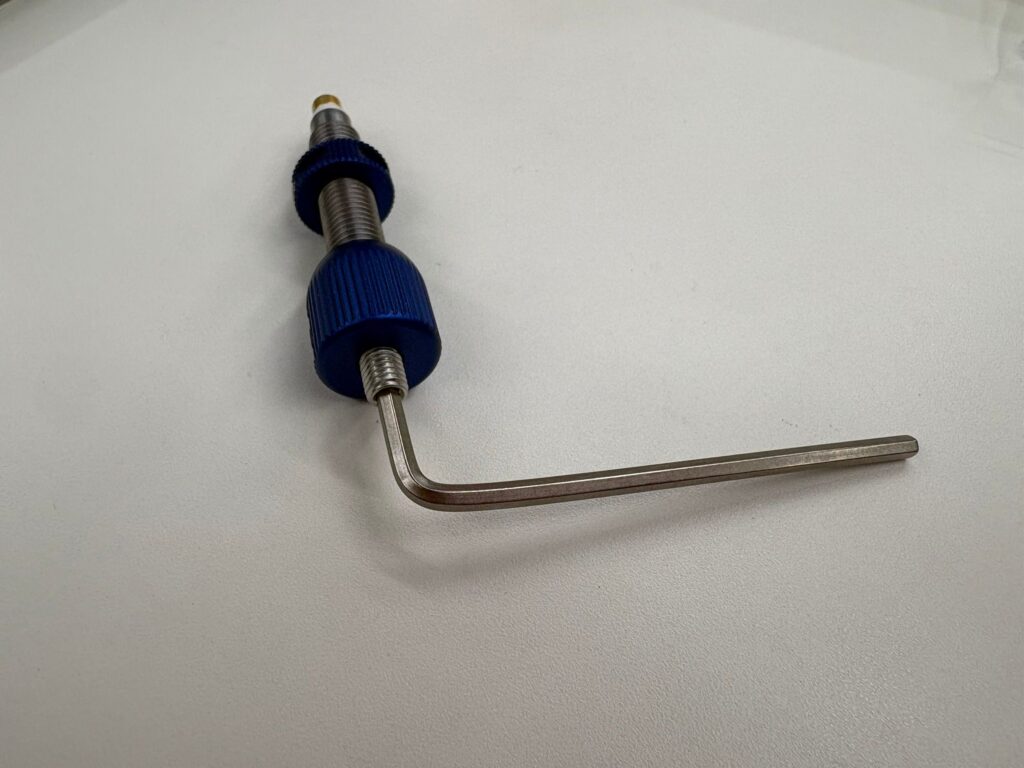
Use only the included 1.5mm hex wrench to adjust the set screw.
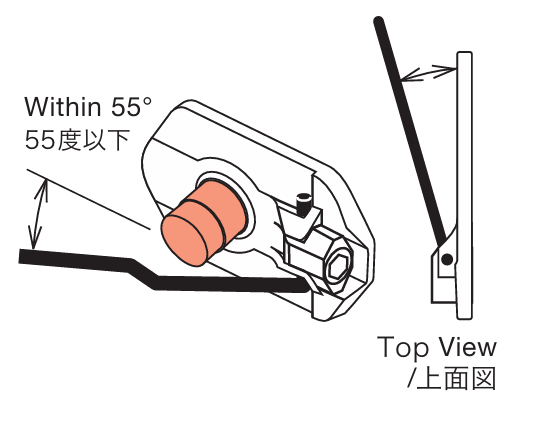
If the Horizontal Arm Angle exceeds 55 °, the arm will not be able to return using the power of the magnet. Please adjust to an angle smaller than 55°.
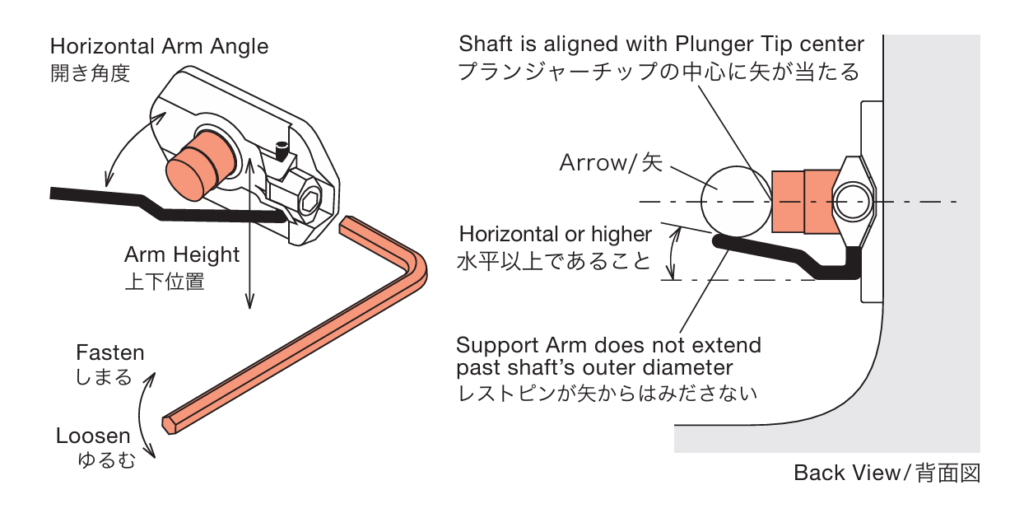
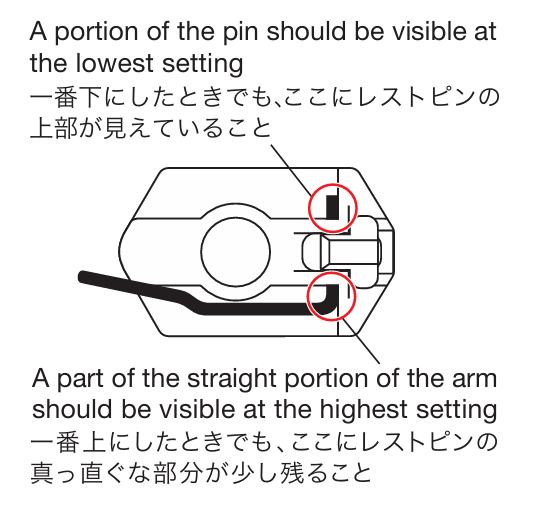
Please refer to the illustration for the vertical adjustment limit. If the arm is raised too high, the curved part of the arm may drag on the base, and hinder correct function of the rest. Please adjust to open a small gap.
NOTE
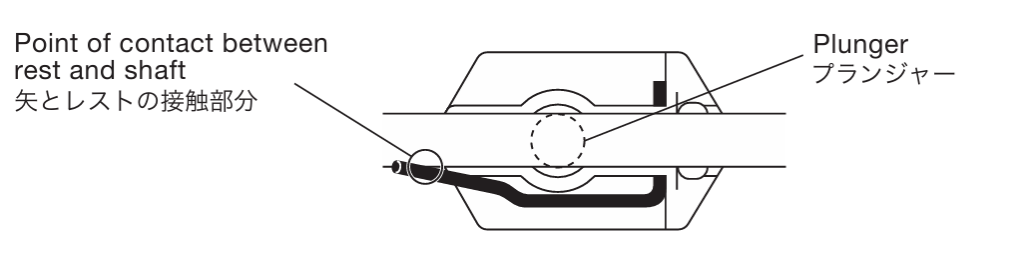
This rest has been designed in a way to use it with small diameter shafts such as X10s, without risking the support arm getting jammed below the plunger barrel. Due to this design, the point of contact with the shaft is slightly closer to the target than directly below the plunger tip. It is not intended to be tuned in a way to have this point directly in line with the plunger t ip.
Fasten set screw firmly after adjustment. Rest may come loose if tightened too hard. Please tighten while holding down the rest base.
Confirm that the support arm returns smoothly after being pushed in.
Please refer to *2 and *3 in case the arm does not return smoothly.In case the rest cannot be adjusted properly using these instructions, please abort installation and contact your archery retailer.
Replacing the support arm
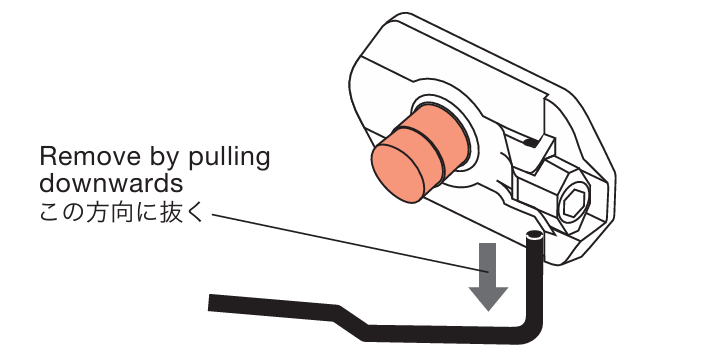
Loosen set screw.
Remove support arm by pulling downwards.
In case the arm cannot be moved downwards, please abort and contact your archery retailer.
The arm may not have enough space to be removed completely if used with some makes of bow risers. In this case, please remove the rest base from the riser before exchanging the arm.
Insert new arm, and adjust tuning.
NOTE
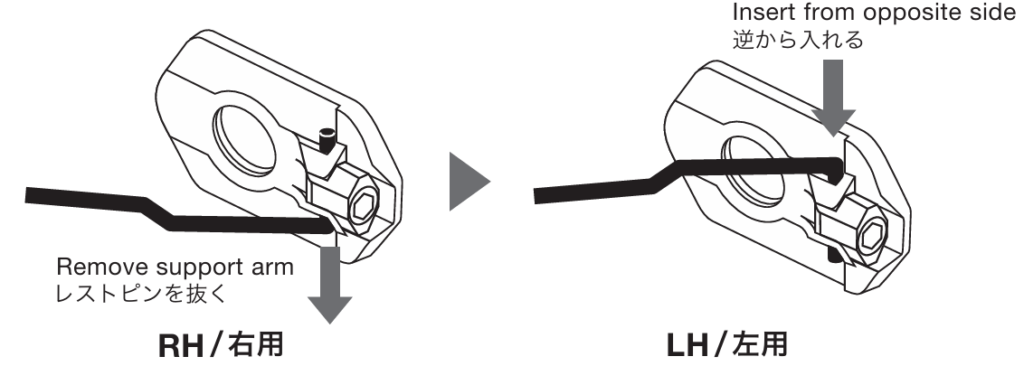
This rest can be adjusted from RH to LH use by removing the arm and inserting it from the opposite side.
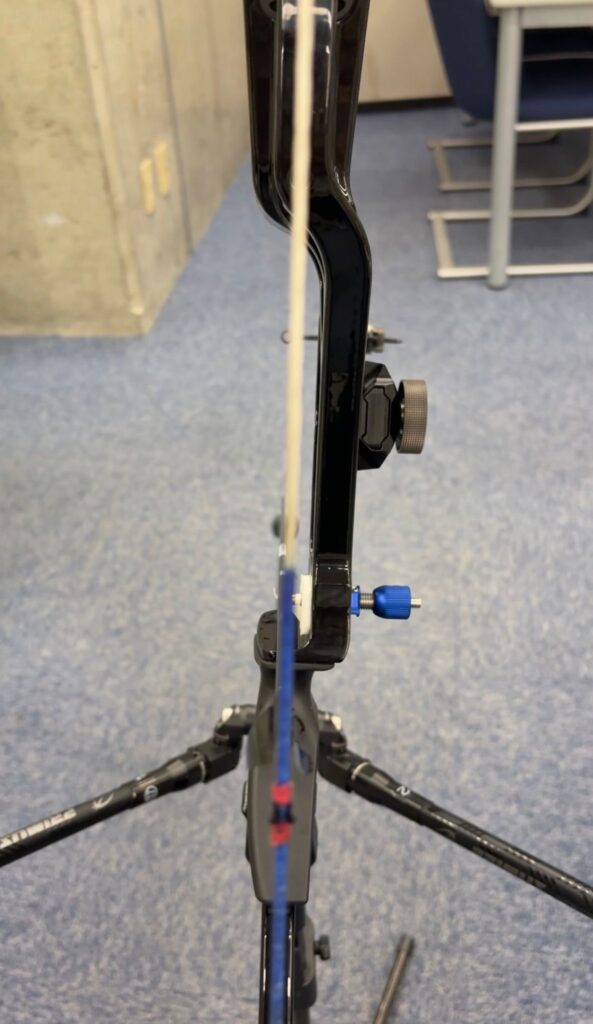
Check the center shot by aligning the string with the center of the riser, and looking straight down the arrow. The arrow point being half a shaft’s width outside (to the left for a right-handed archer) the string is a good starting point for tuning.
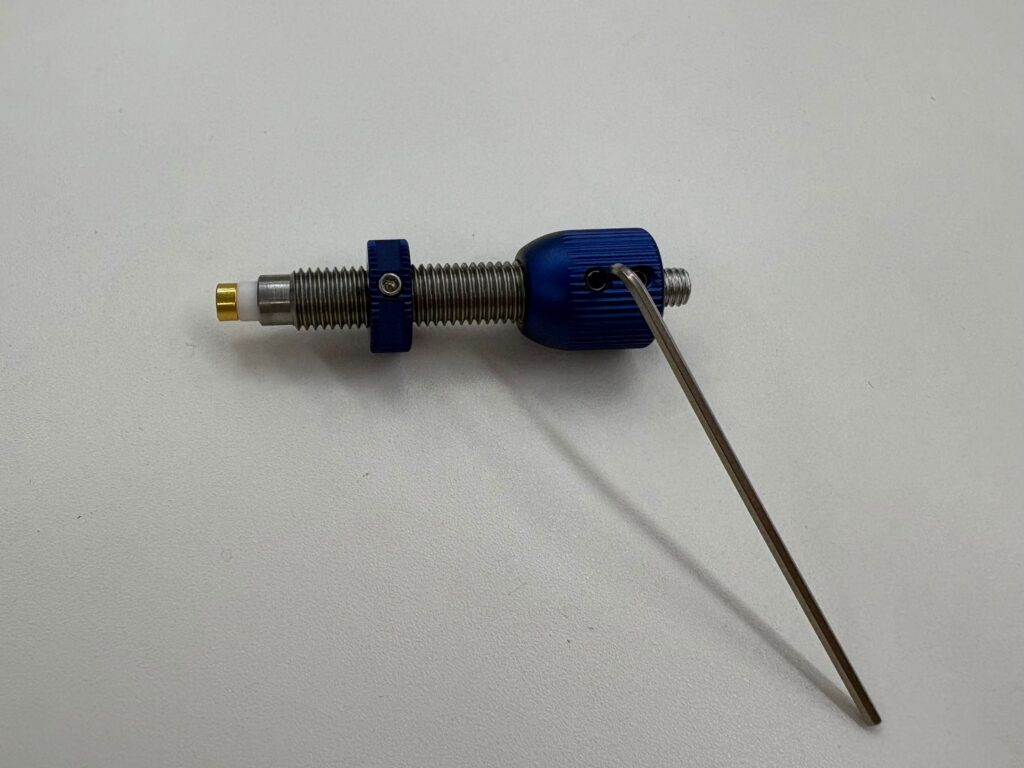
If the center shot needs adjustment, loosen the UL-45 Set Screw on the Center Slider(PB-4).
Adjust the Center Slider to achieve the Center Shot position indicated above, then re-tighten the set screw and re-seat the plunger.
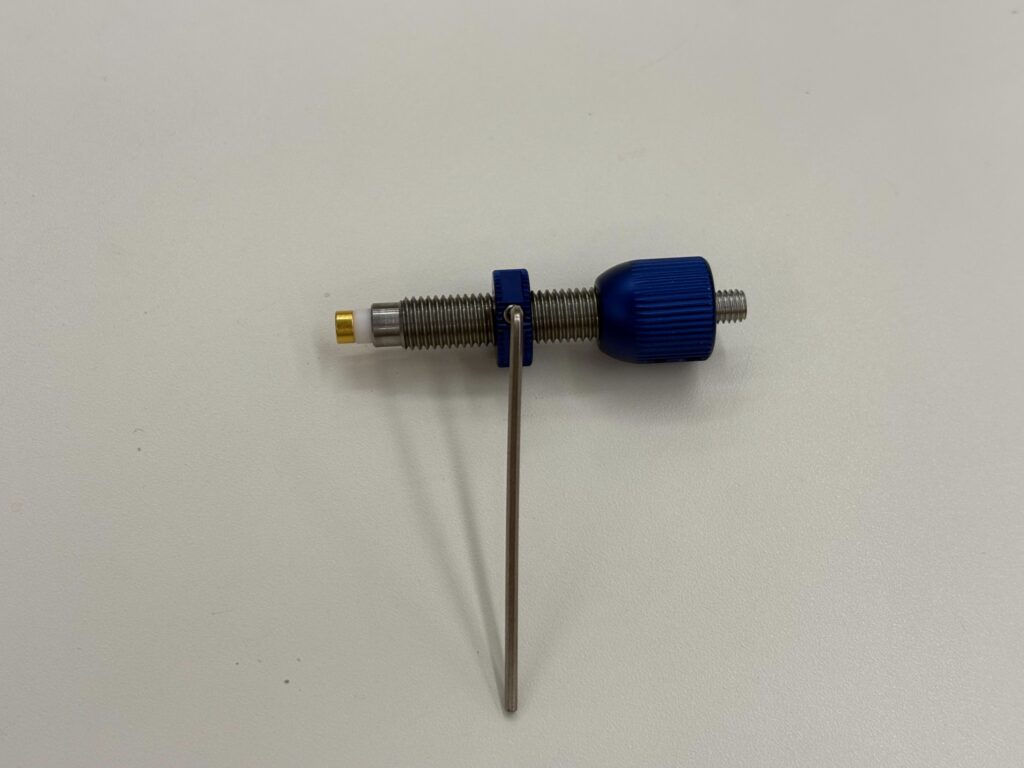
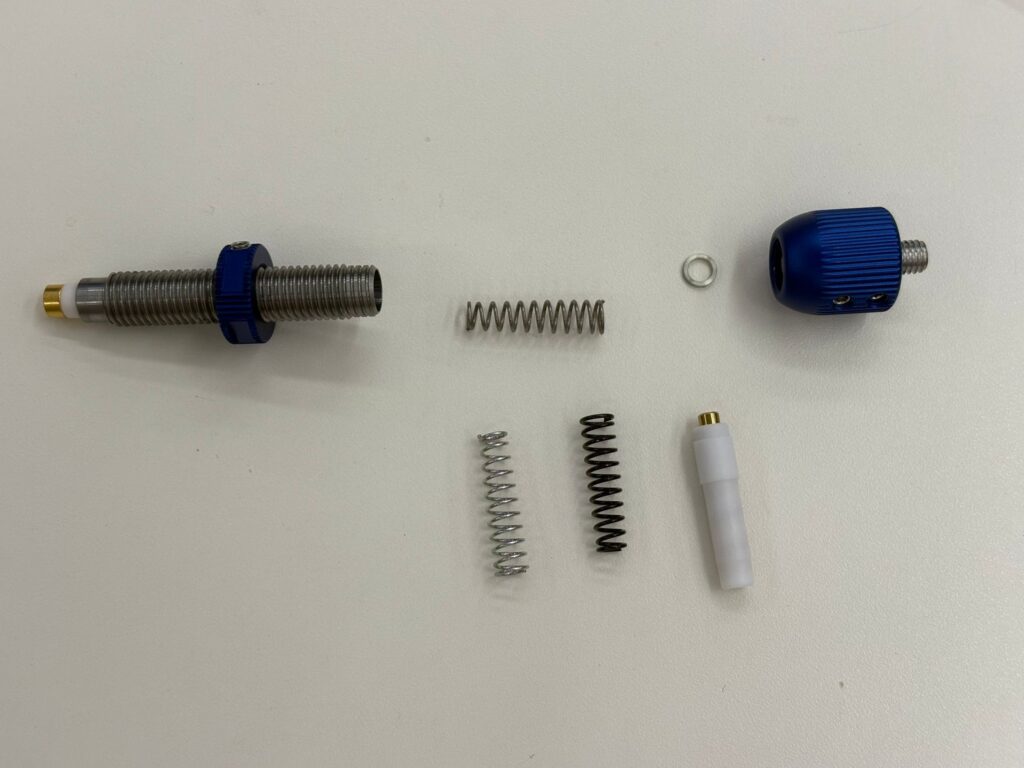
DX Plungers come standard with a 0.55 (Medium) spring installed. For most archers, this offers a good basis for adjustment. 0.50 (Light) and 0.60 (Heavy) Tension Springs are included in the package.
To determine whether the plunger spring tension is correct, basic bareshaft tuning offers a good starting point.
To adjust Spring Tension, loosen the UL-45 Set Screw at the far end of the Plunger Head(PB-2).
Twist the Tension Adjust Screw(PB-8) using the included 2.5mm Hex Key Wrench clockwise to increase tension, or counter-clockwise to decrease tension.
If further adjustment is required beyond the tension screw’s range, loosen the UL-45 Set Screw at the base of the Plunger Head(toward the middle of the plunger). This allows you to remove the Plunger Head.
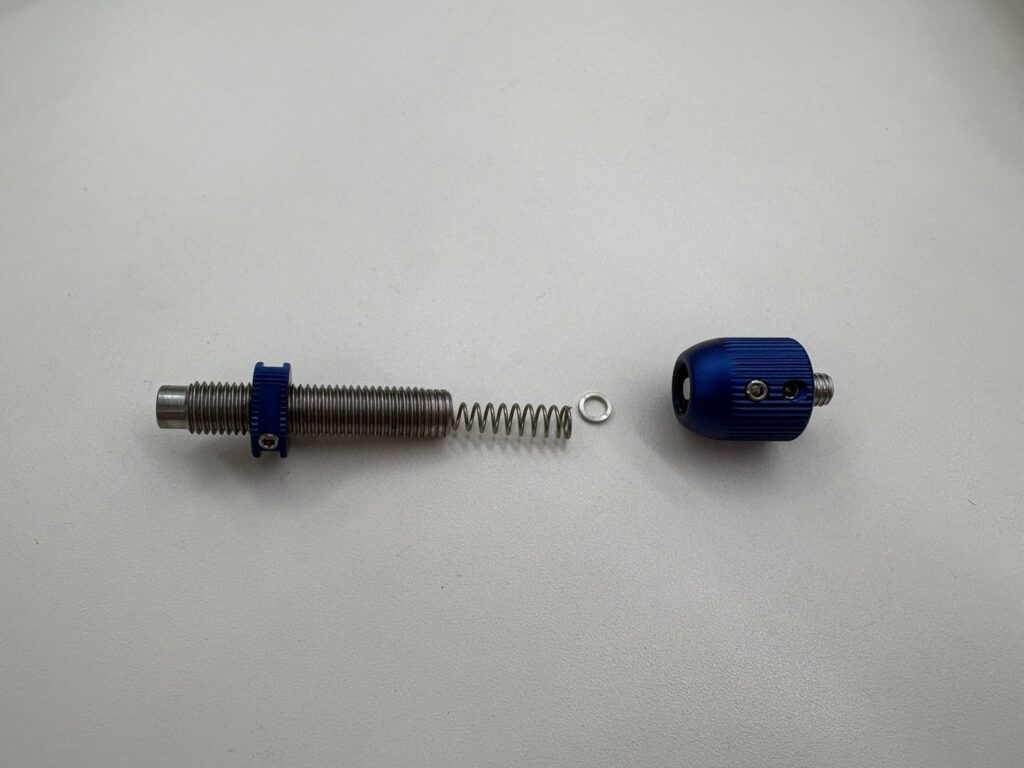
Remove PB-2 Plunger Head and exchange the spring. Take care not to lose the PB-10 washer between the spring and the Plunger Head.
Replace the Plunger Head and fasten the set screw. Repeat barebow tuning procedure from step 6.
Tip replacment
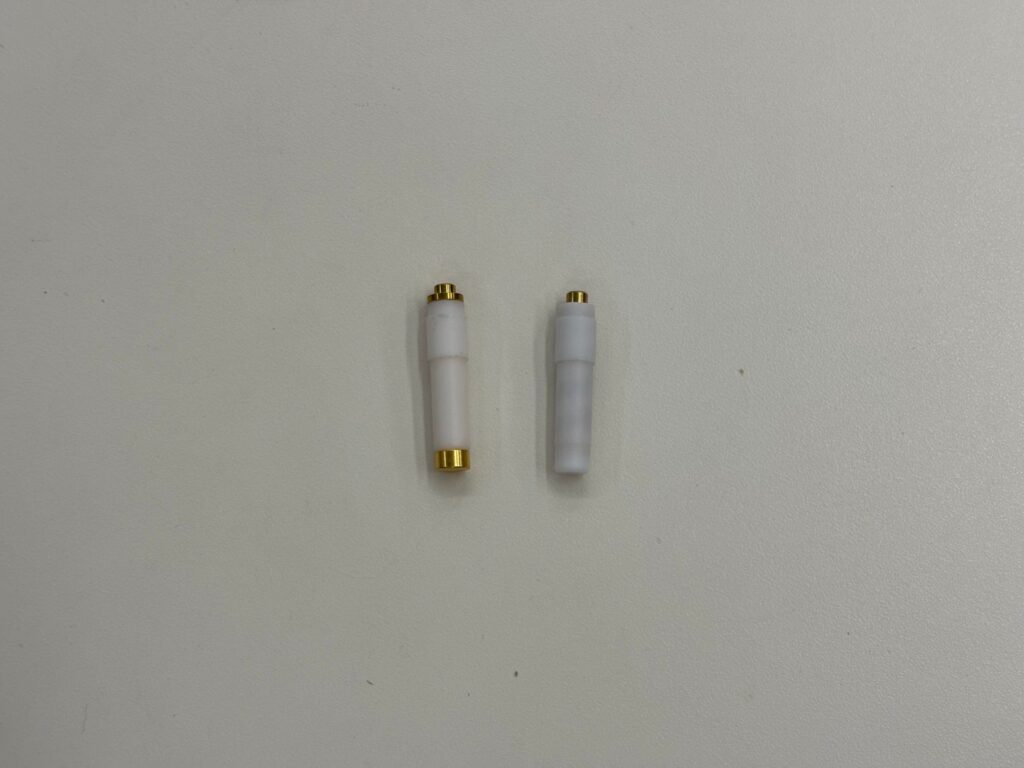
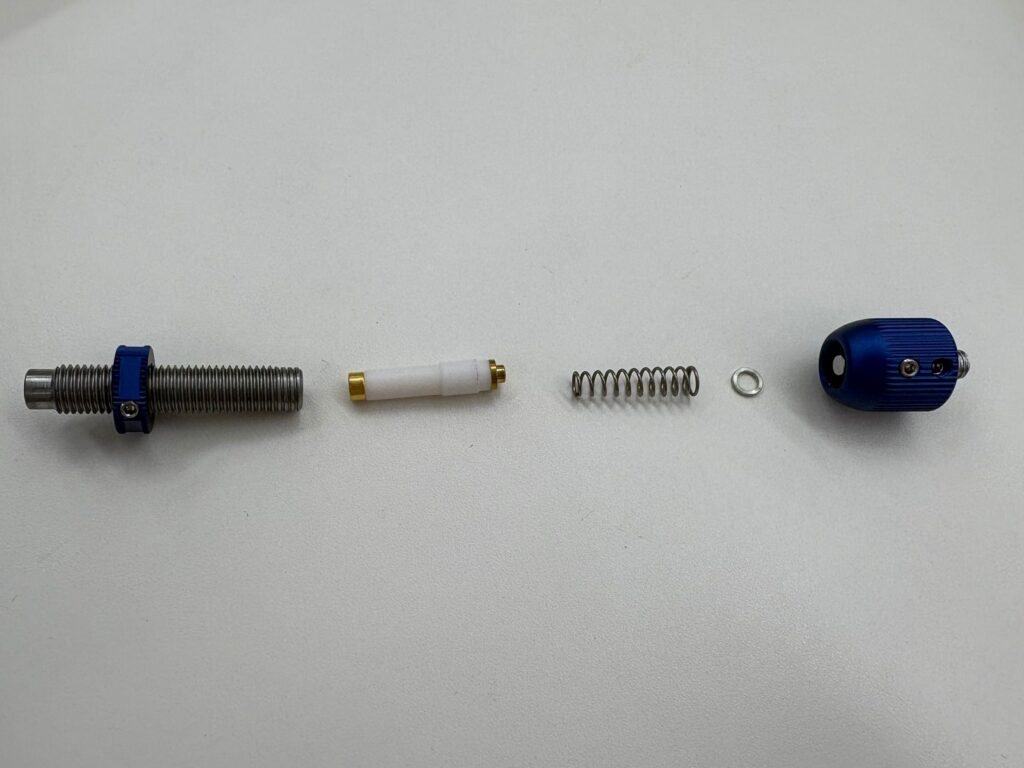
DX Plungers come with a Gold-Plated Tip(PB-3G) installed. This tip offers good low friction properties, and excellent durability. The package also includes a PB-3 Teflon Tip. This tip offers superior friction properties but deforms more easily and needs replacement after extensive use.
Loosen the UL-45 Set Screw at the base of the Plunger Head(toward the middle of the plunger). This allows you to remove the Plunger Head.
Remove the Tension Spring and Plunger Tip. Take care not to lose the PB-10 washer between the spring and the Plunger Head.
Install the new Plunger Tip, and replace the spring, washer, and Plunger Head.
Fasten the set screw. The Plunger will have the same tension setting as before the procedure.
Routine maintenance
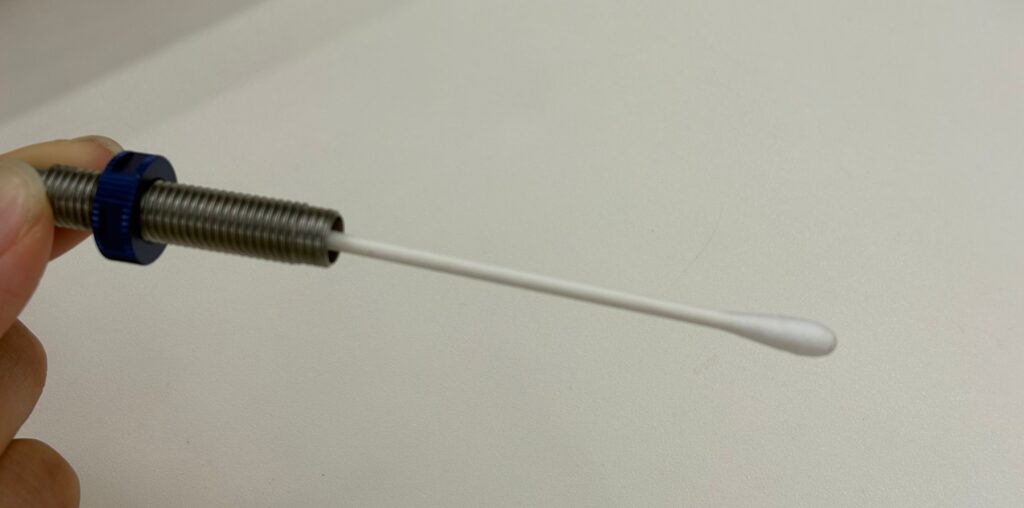
We recommend cleaning the plunger thoroughly after shooting in rain or dusty conditions.
Loosen the UL-45 Set Screw at the base of the Plunger Head(toward the middle of the plunger). This allows you to remove the Plunger Head.
Remove the Tension Spring and Plunger Tip. Take care not to lose the PB-10 washer between the spring and the Plunger Head.
Wipe the inside of the plunger with a Q-Tip or similar. Make sure to wipe any remaining moisture off all surfaces of the plunger.
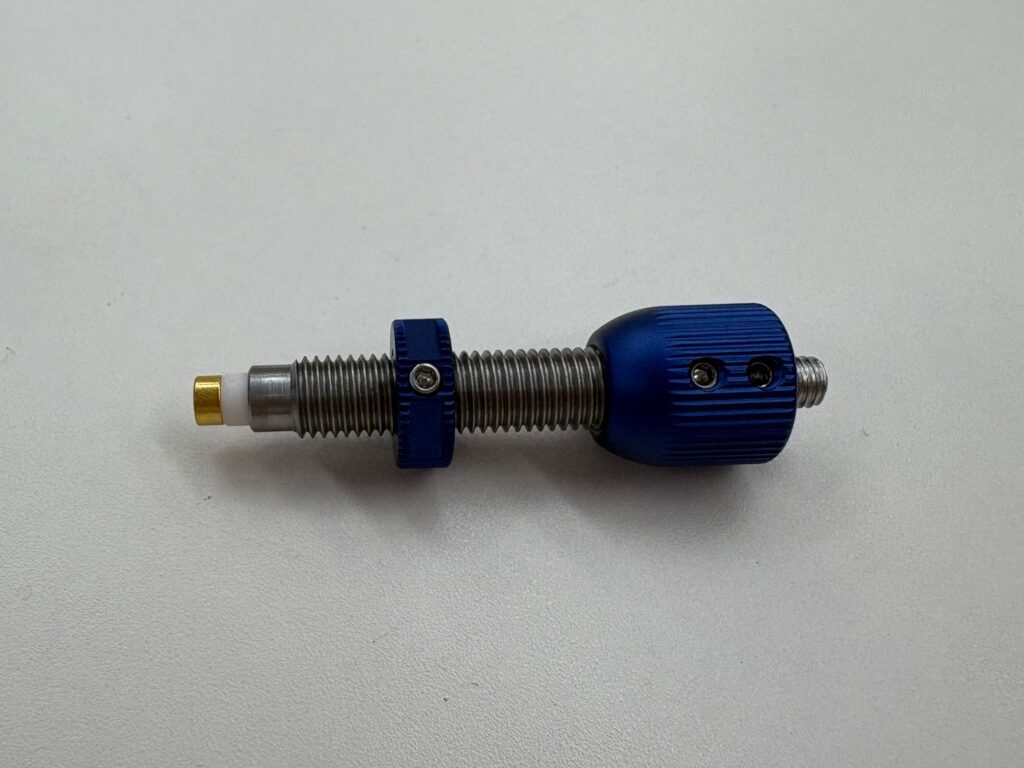
Reinstall the spring, washer, and Plunger Head.
Fasten the set screw. The Plunger will have the same tension setting as before the procedure.