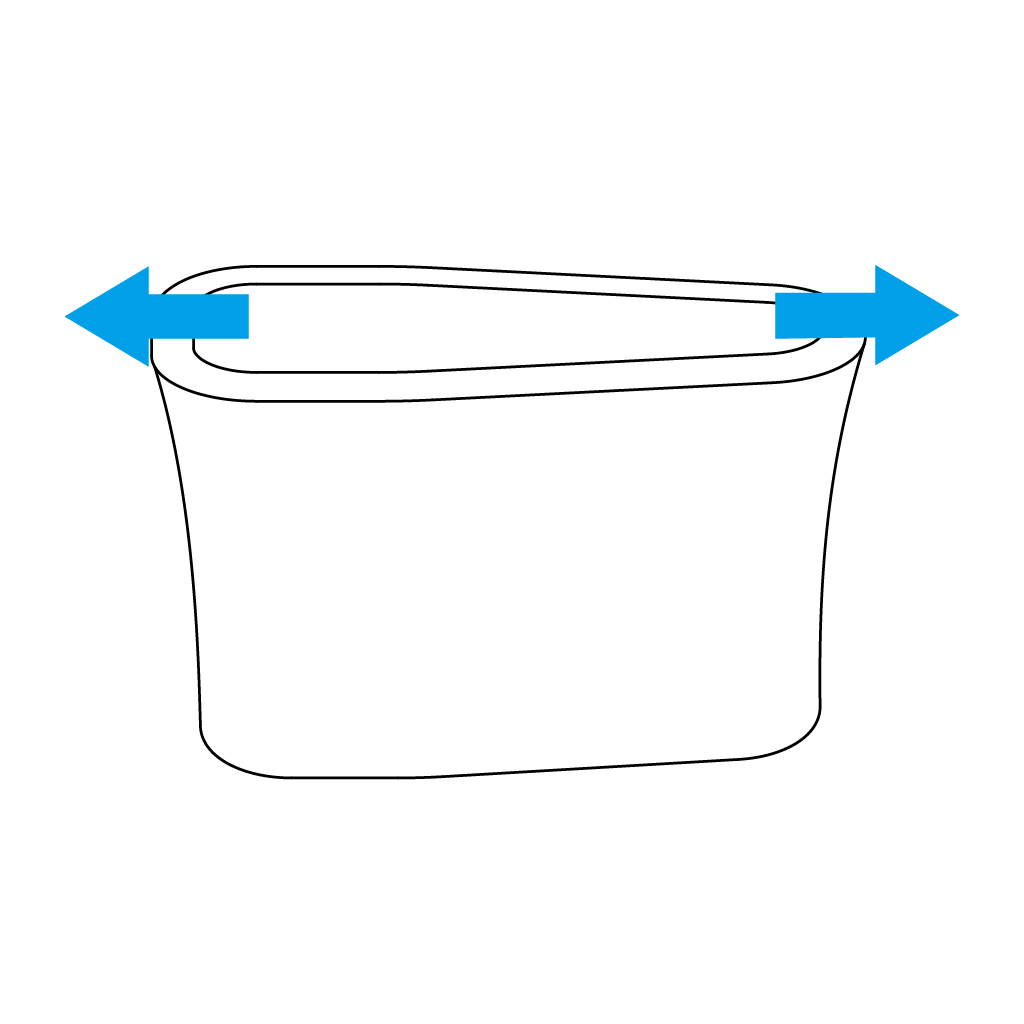
Insert from one side of the AP- 2 Finger Spacer as shown.
Stretch the AP- 5 Finger Spacer Rubber, pulling it over the opposite side of the Spacer.
Press it down while covering both sides.
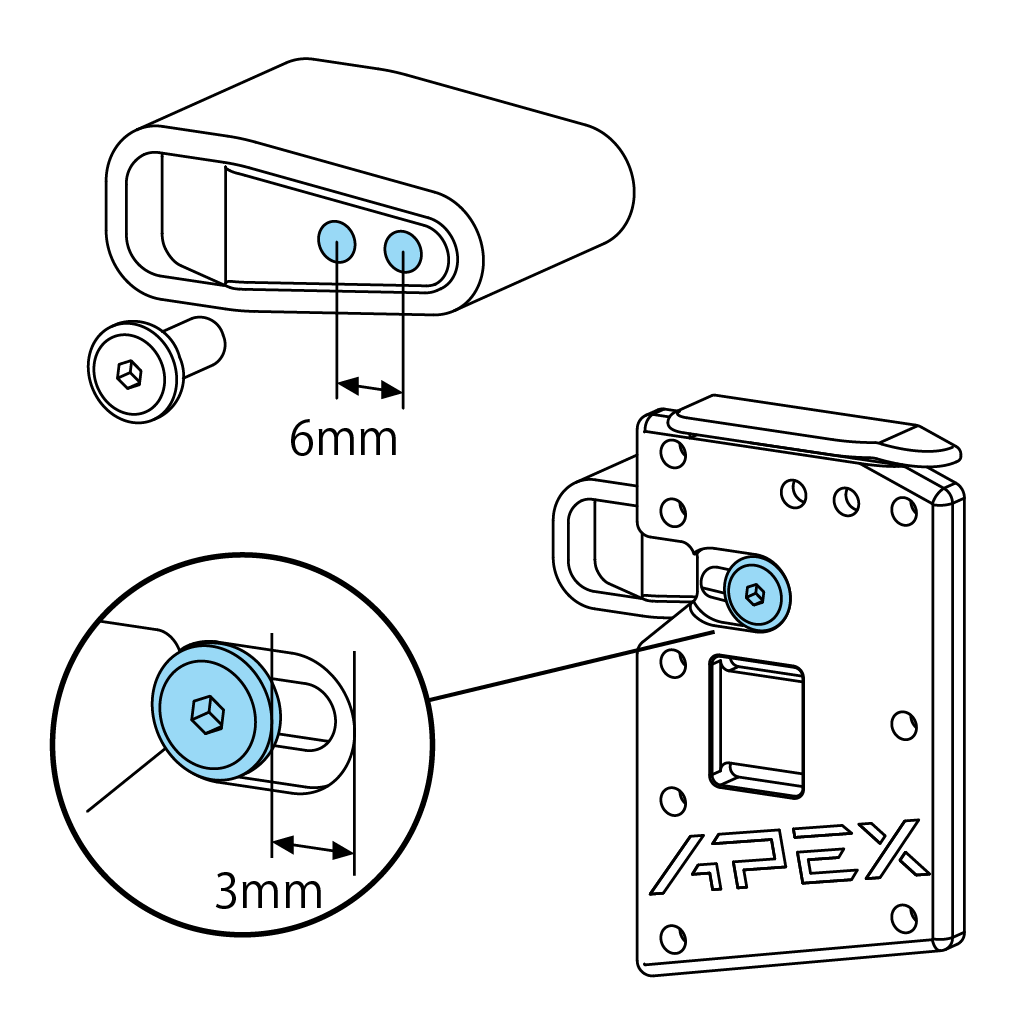
Adjusting the Finger Spacer
The AP-2 Finger Spacer’s attachment position can be moved laterally in 6mm increments by removing the CT-6 Ultra Low Head Cap Screw. Additionally, it can be adjusted by 3mm by loosening the CT-6 Ultra Low Head Cap Screw and sliding the Spacer. Adjust to fit the depth of your fingers’ hook on the string.
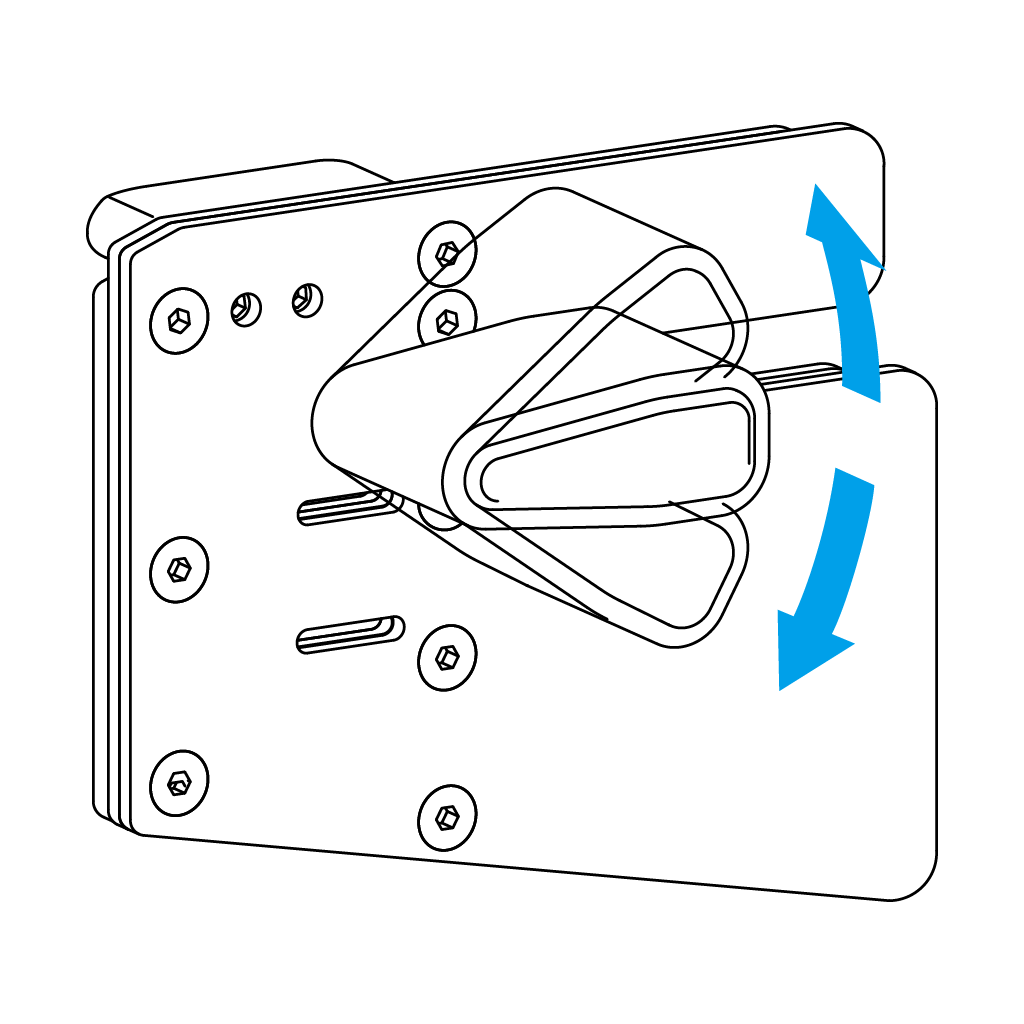
The AP- 2 Finger Spacer can be tilted vertically by loosening the CT-6 Ultra Low Head Cap Screw. Adjust to fit your preferred hook angle and re-tighten.
The AP-2 Finger Spacer features an anti-slip edge on the surface facing the Backing Leather, to securely fix the position and angle.
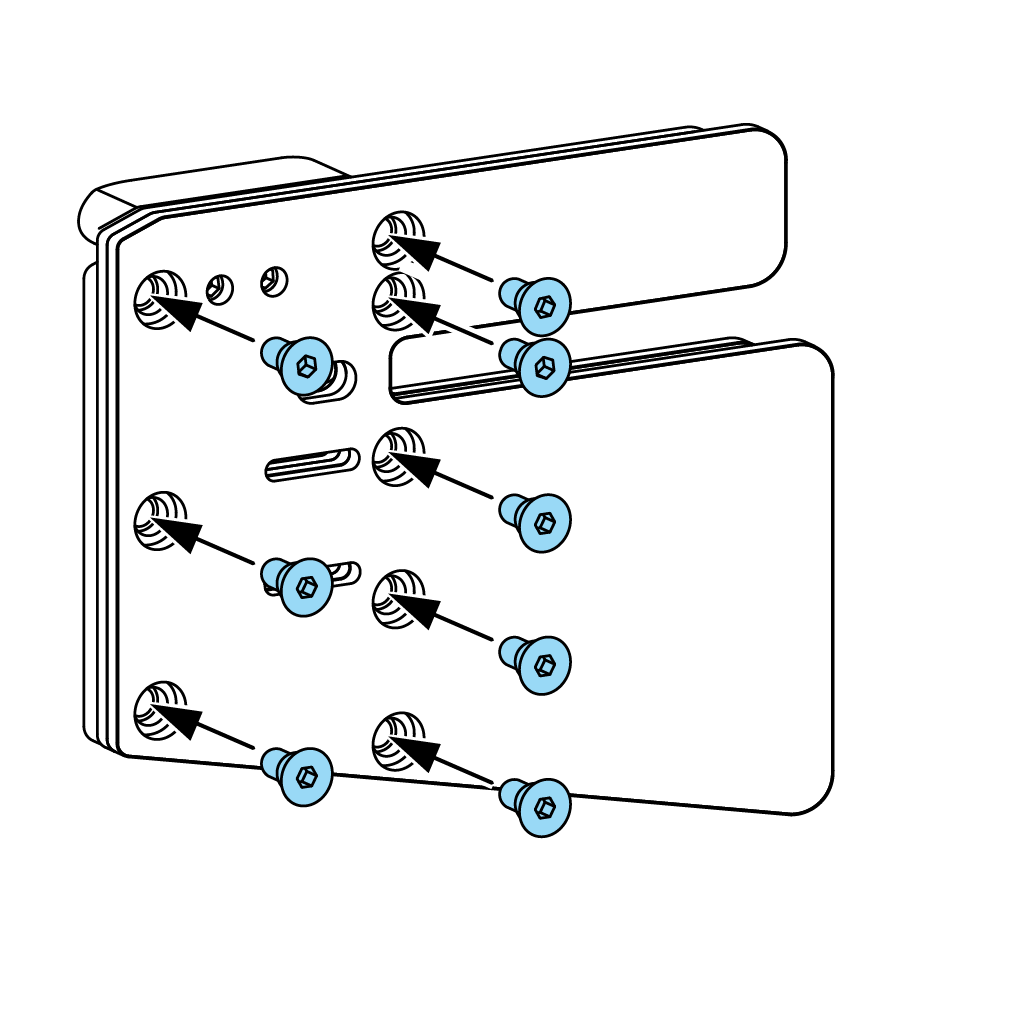
Replacing the Tab Leather
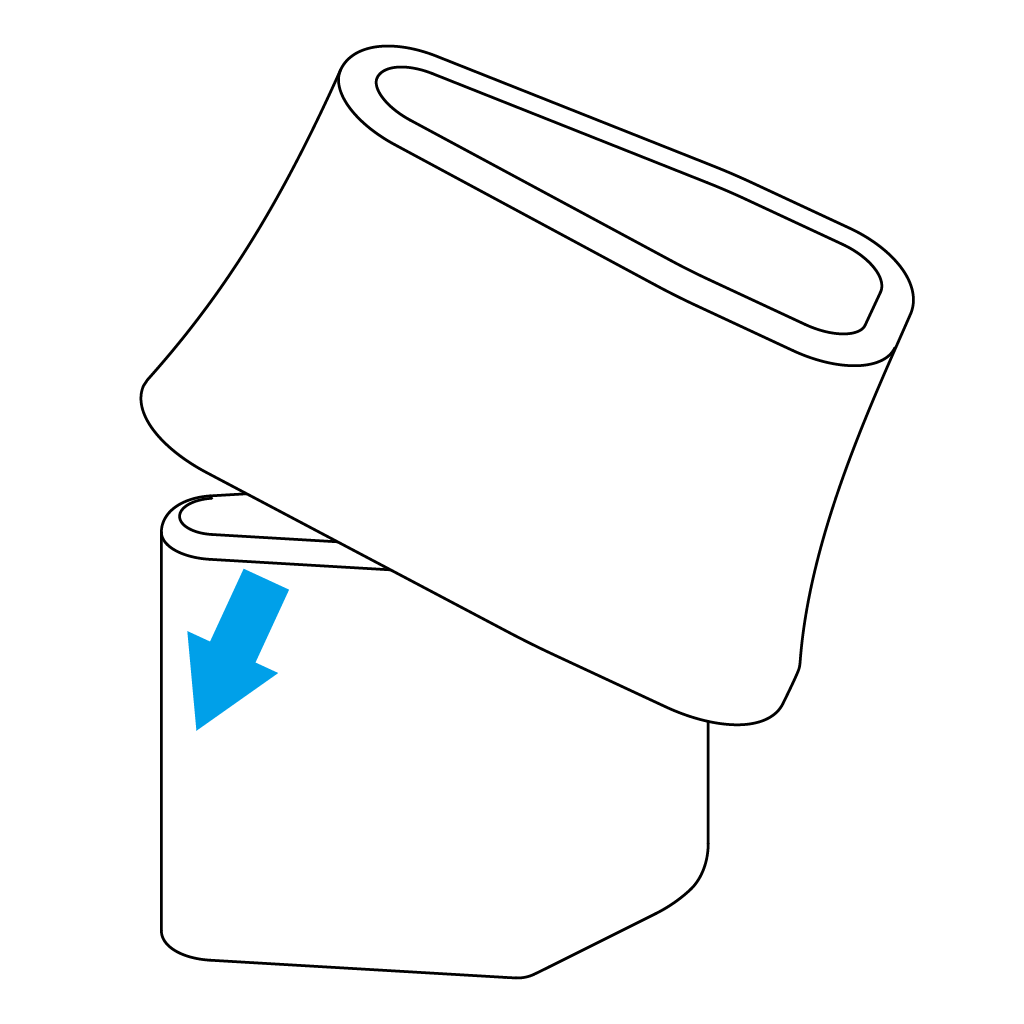
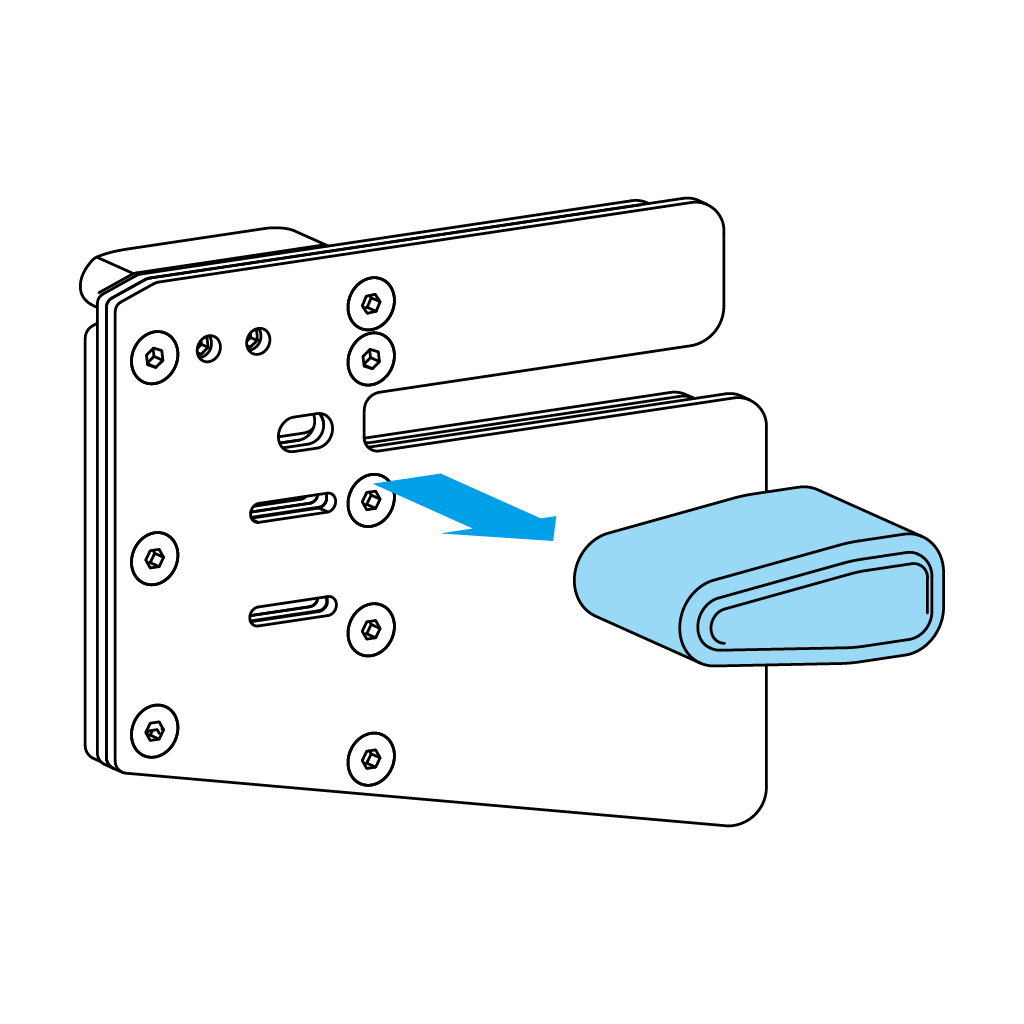
Loosen the screws to remove Finger Spacer and Finger Loop Belt.
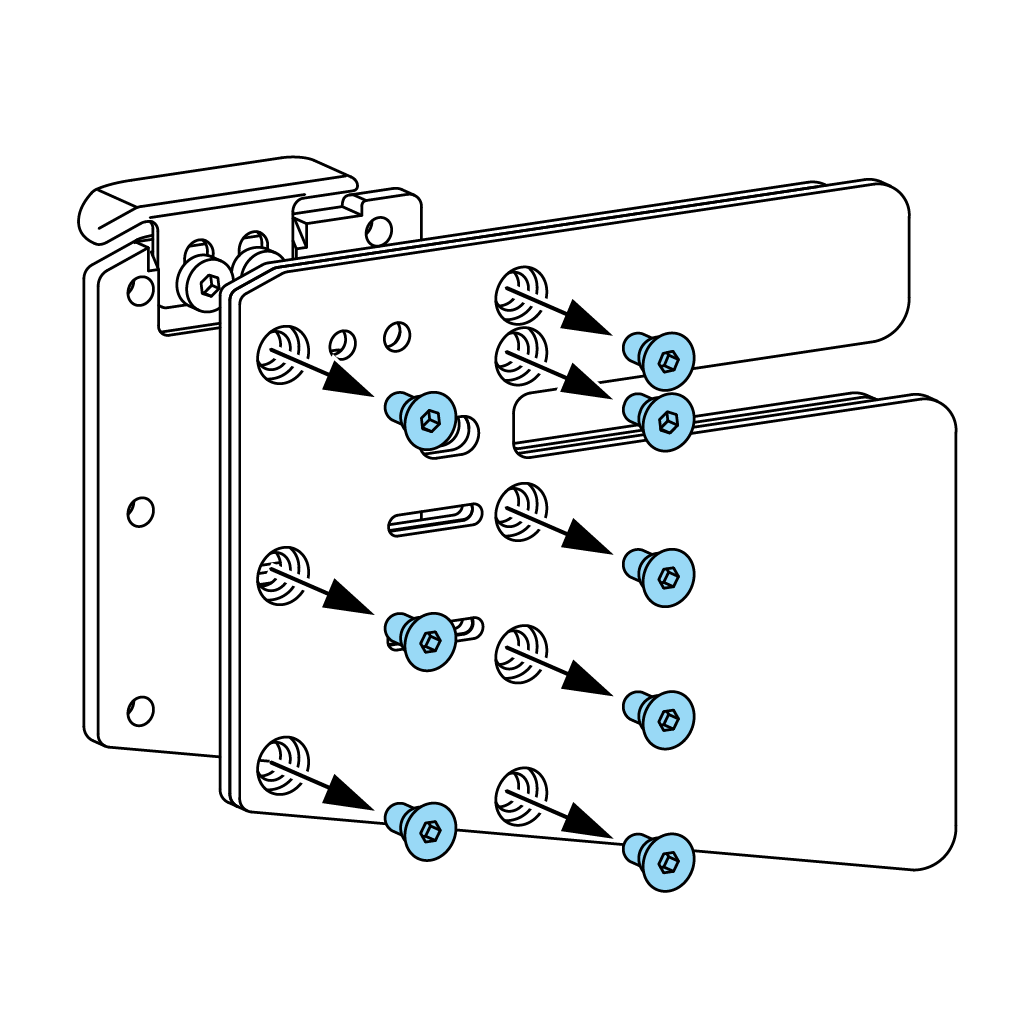
Loosen and remove all CT-8 Countersunk Head Screws and exchange the Backing Leather and Cordovan Face.
Align the leather’s holes with the threads in the plate, and fasten the CT-8 Countersunk Head Screws.
Once you have attached the Backing Leather and Cordovan Face, replace the Finger Spacer and Finger Loop to their original positions.
Anchor Pad Replacement & Adjustment
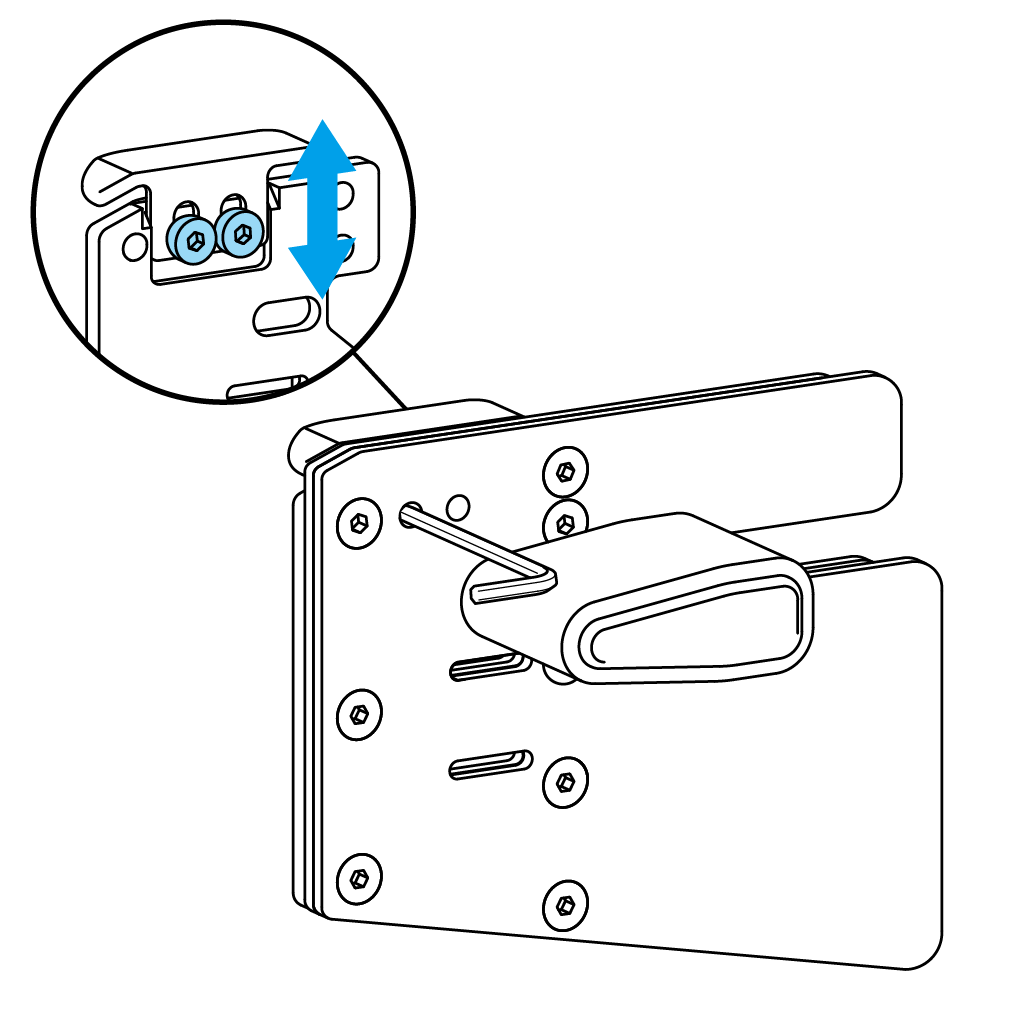
Adjusting the vertical position
The CT-4 Anchor Pad can be adjusted vertically by inserting the wrench through the holes in the backing leather, and loosening the CT-7 Low Head Cap Screws. Adjust it to your preferred position and tighten the screws.
You can adjust the Anchor Pad to a horizontal position by aligning the etched lines with the plate’s edge.
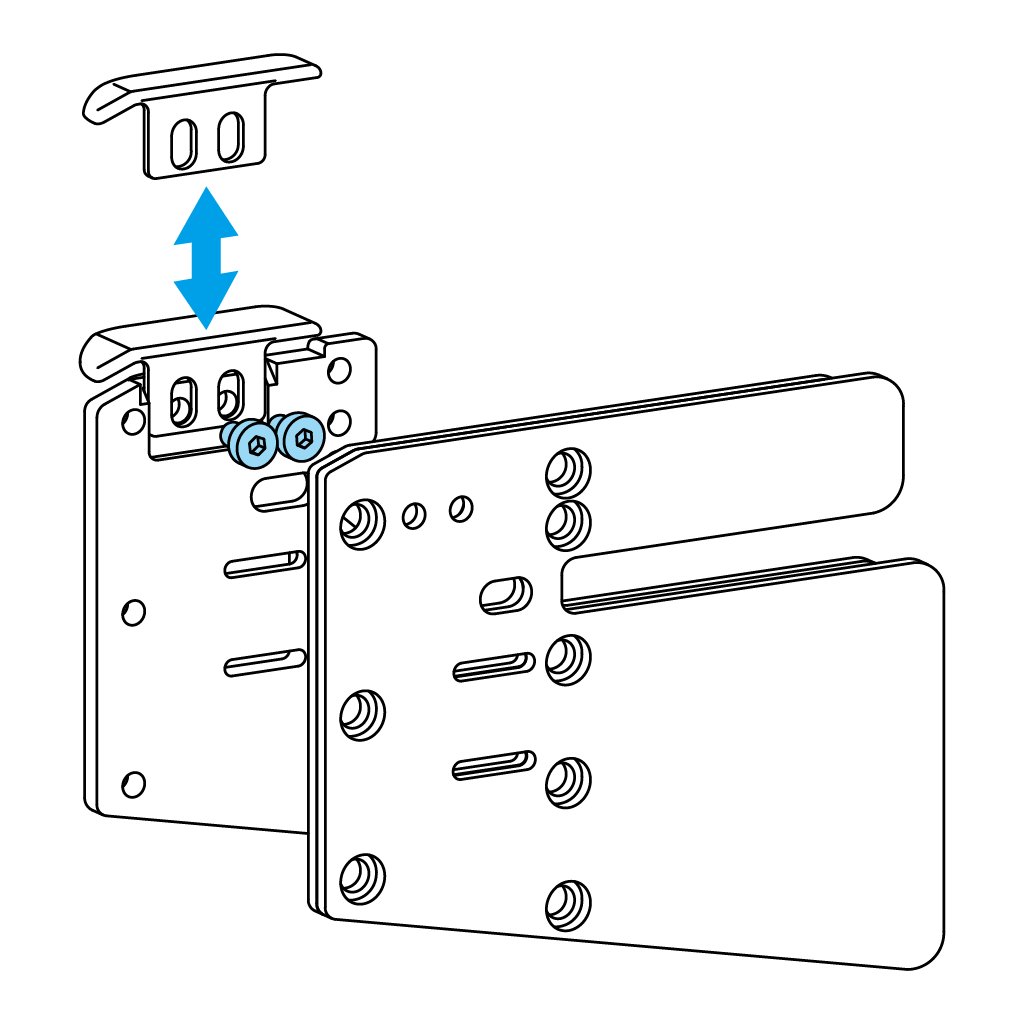
Exchanging the Anchor Pad
For archers who do not require a wide anchor pad, it can be exchanged to the CT-5 Anchor Pad Slim, which has the same width as the Tab Plate.
Remove the screws using the enclosed wrench, and remove the Backing Leather and Cordovan Face from the Tab Plate. Loosen the CT-7 Low Head Cap Screws, and remove the CT-4 Anchor Pad.
Adjust the CT-5 Anchor Pad Slim’s position, and fasten the CT-7 Low Head Cap Screws to lock it in place.s
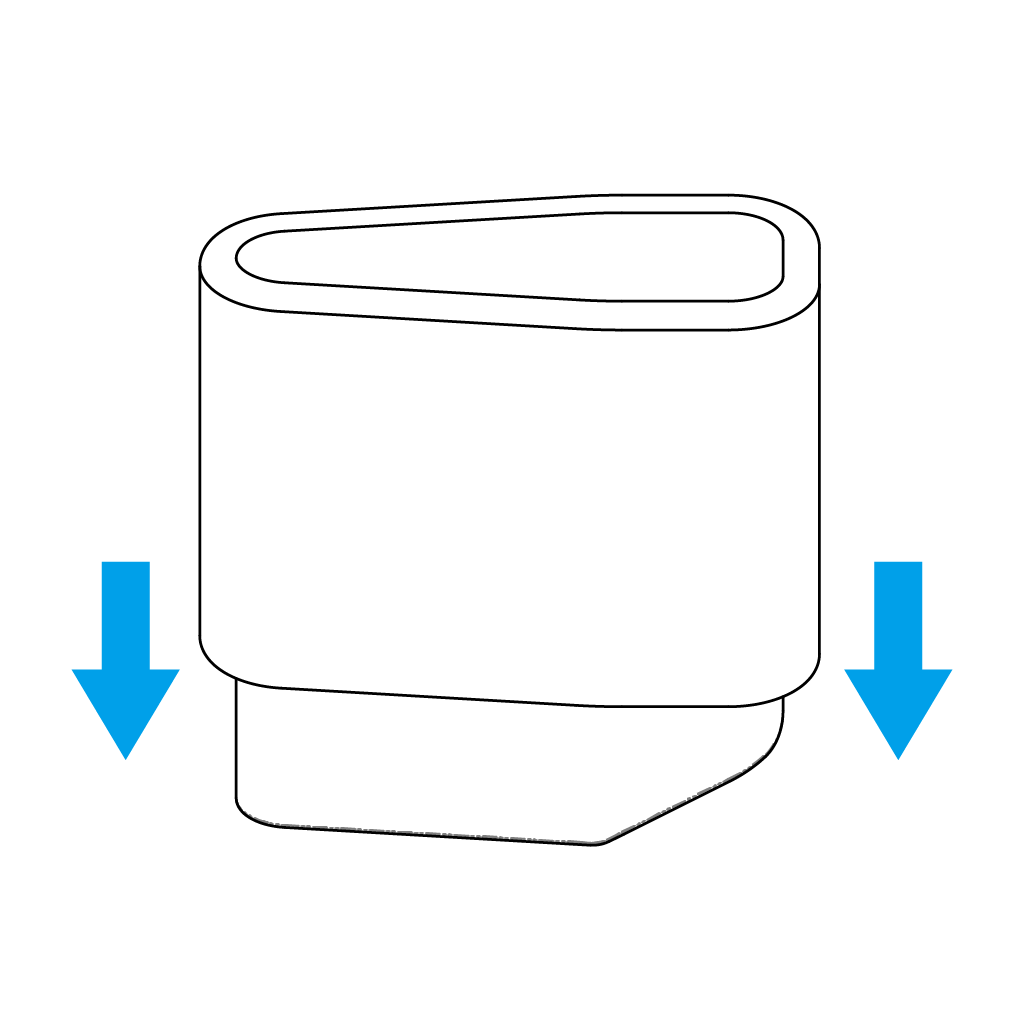
Cutting the Leather
After you have adjusted the Anchor Pad, cut the Backing Leather and Cordovan Face to match its height.
If you have aligned the Anchor Pad with the main plate, cut the Backing Leather and Cordovan Face to match the plate’s height.